
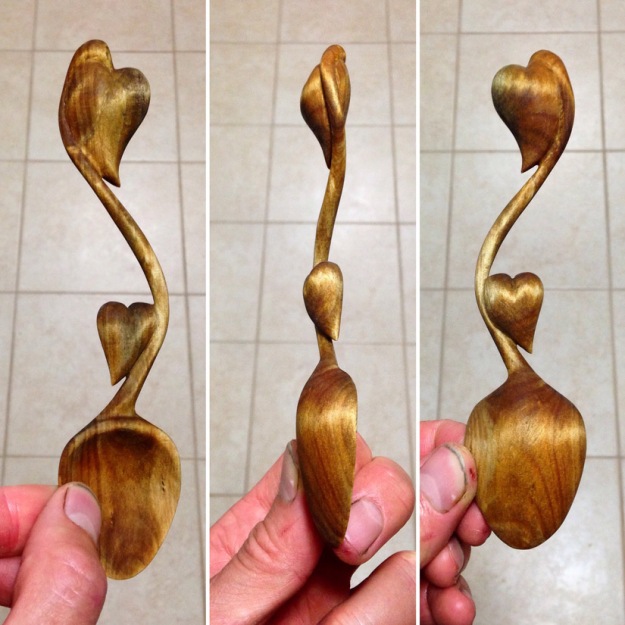
The following text and lovely accompanying photographs were kindly sent in by Woodlore customer Tom Scandian:
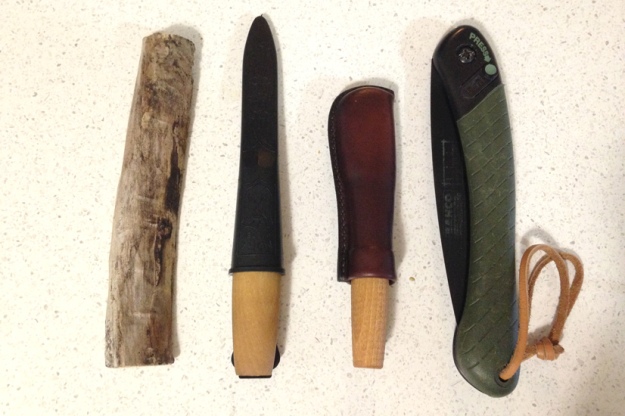
You need very few tools for spoon carving which are very cheap and great quality, all of mine have come from Woodlore and include a Mora Carving Knife, S Djarv Hantverk large Spoon Knife, Folding saw and a Mora Heavy Duty. You can carve basic spoons with just a normal pocket knife, however a good quality spoon knife and carving knife go a long way to improving quality and detail!
Firstly I look for a piece of wood that has a straight grain, is dead standing, free of knots and as close to the size of spoon I intend to make as possible. Using larger rounds will simply cause you to chip away for prolonged periods which will waste time, dull your blade and tire you unnecessarily (especially if you are new to carving). In the UK Lime is a beautiful wood to work and a great choice both green or dry.
Wood and tools ready for carving
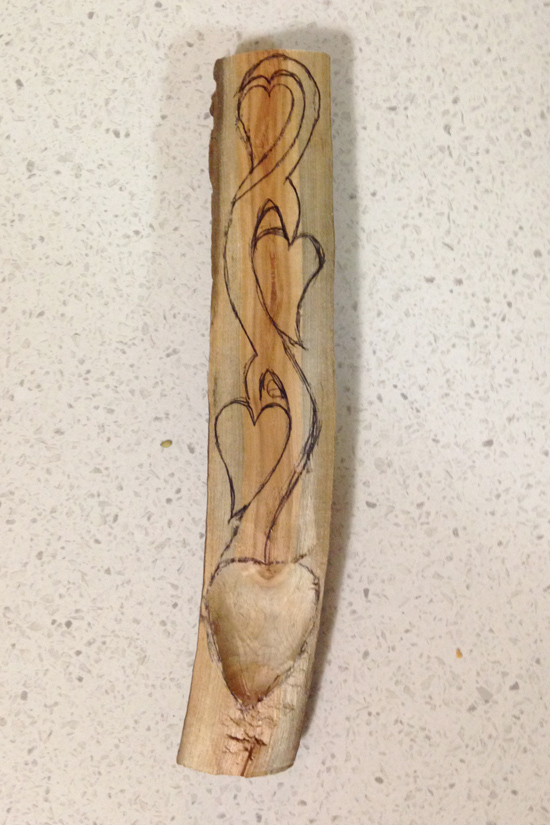
I then split the wood in half through the centre followed by carving away any remaining pith. This step is important as leaving any pith will leave a weak and possibly hollow area that can’t be removed easily later, better to start out without.
Once the blank is flat and has no remaining pith I draw my design onto the blank.
Hollowing the bowl is better done earlier rather than later so you have the full strength of the wood. It also gives you something comfortable to grasp while doing so. You will find that the first few cuts are the most difficult as you are working directly against the grain, however each cut will get progressively easier as the cut reduces in angle to create the bowl. At this stage take small light cuts.
Once hollowed, I shape the underside of the bowl until the desired thickness is reached. I find using the chest leaver grip offers the best control and also gives the best view of where you are cutting.
If a design requires carving all the way through the piece of wood, again, I do it early on, even before I make any stop cuts. It’s best to have as much strength in the piece of wood as possible whenever possible.
I then put a stop-cut on any concave part of my design to stop the knife traveling against the grain and likely splitting it.
Now it’s just a case of taking my time and carving each and every section of the spoon as accurately and neatly as possible. I find using a desk lamp when at home to be really helpful.
Most of the time (and always when cutting intricate sections) I place my index finger of my knife wielding hand along the side of the blade for stability and control and pivot the spine of the knife around my thumb. This gives superb control and accuracy. I alternate which hand I hold the knife in depending on the grain orientation but the principle is exactly the same.
When I can no longer get the finish any better with a sharp knife, I then begin sanding. With tight curves and angles it’s quicker, neater and faster to get a good finish with a knife instead of relying on sanding it out. Sometimes it’s almost impossible to get a piece of sand paper in a tight gap and if you do, you’ll likely be rubbing off any sharp angle or edge that you want to retain in the process.
Once I’m happy I can’t do any more with the knife, I use sandpaper and normally start with 120 or 240 grit. It’s worth mentioning that the first few grits are the most important. I take my time and not rush through them ensuring I get as good of a finish as I can.
From here I take a toothbrush and brush off the dust and remaining grit, doing this each time I change grits.
It’s worth using a desk light again when sanding as it will show up any flaws or parts that need more attention in your work and it’s better to notice them now rather than later!
Once I have gone through the grits, normally up to 600 and once I have brushed off any remaining bits of sandpaper, dust, grit and fine sandpaper dust I apply a finish.
If the piece is intended to be used for food I’ll use a food grade mineral oil, if not then boiled linseed oil is great and dries fairly quickly!
Thank you Woodlore firstly for supplying the great tools I use, secondly for allowing me to share this article and thirdly for the great customer service!


- Tom Scandian


Hello there.
You carved a really beautiful spoon. Thank you for your interesting spoon carving tutorial.
Looking forward to hearing from you.
LikeLike
Thanks for the kind comments, its not so much that it is difficult, more time consuming!
LikeLike
Holy mother of god!!
This is just beautiful. You are an artist.
greetings from Germany
LikeLike
Wow, that’s really something!
Beautiful carvings man; thanks for sharing!
LikeLike
I liked your idea, unfortunately I only had these two knives, took me a while, here’s the result:
nice post. 🙂
LikeLike