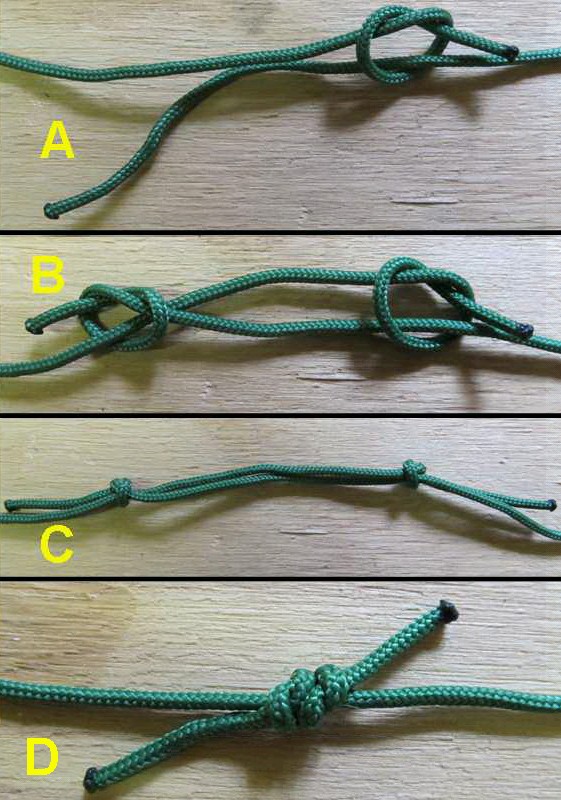
Figure 2 – The Fishermans Knot ← Previous Next → Figure 2 – The Fishermans Knot Figure 2 – The Fishermans Knot