For your chance to win four places for you and your kids on our new Family Wildlife Walkabout course in 2012, plus £1,000 spending money, take a look at this very special competition being run by ITV Wild:

For your chance to win four places for you and your kids on our new Family Wildlife Walkabout course in 2012, plus £1,000 spending money, take a look at this very special competition being run by ITV Wild:

Tightening the hammock:
On the other side, do the same, but without the two outer tension ropes. After you take the two ropes through the first bar, weave them through the edge meshes of the hammock and insert them through the second bar. Hang your hammock between two fixed points now and go in it. Make sure you distribute your weight as evenly as possible when you first enter the hammock. Before entering, it is wise to check the hammock if the mesh and mazes are even, and adjust them when necessary. When I worked with paracord I found that the knots were able to slide and move because of the slipperiness of the cord.
The hammock will now stretch out. Depending on the material you have chosen you will probably have to repeat it a couple of times. I use a Timber Hitch on one end and a Waggoner’s Hitch on the other. This last knot is described in Ray’s Essential Bushcraft book on page 168, and is ideal to put some tension to your hammock. Tighten the hammock again and again and put your full weight on your project until you feel the hammock is not getting any longer.
At this time be careful not to fall out of your hammock because the outer tension ropes are not in use at this time. When they are in use these ropes will greatly improve your ability to stay in your hammock. When you think your hammock has been stretched enough it is time to put the outer tensioning ropes to work. Connect the loose ends of those outer tensioning ropes with each other with a simple Reef Knot.
By tightening or loosening those outer ropes you are able to switch between different models of your hammock. Tightening those ropes will result in a model consisting of a bathtub, while loosening those ropes will result in a hammock like an ironing board. Now, check the rest of your hammock and remove any pieces of rope which are too long.
The finished Hammock:

Figure 14 - The Finished Hammock
Woodlore would like to thank John van Zanen for all of his hard work in putting this extensive guide together. You can expect more from this contributor in the future…
To everyone out there who has used this guide to make your own hammock, please let us know how you got on, and send us a photo to show where your hammock ended up!

If you’ve been enjoying Ray’s current ITV series, Wild Britain with Ray Mears, you can now watch exclusive bonus video content on the ITV Wild website, via the link below:


Back in August of this year, we posted some photos on our blog of a Julius Pettersson knife, which Woodlore customer Nick Simmons had made a handle for. Shortly after this, Nick got in touch with us again to share some photos of his original WK1 Woodlore Knife, which, after years of use, he decided to re-scale.
When asked if he’d mind us posting the pictures on our blog, he replied, “Yes, but I fear the puritans will hunt me down and lynch me for changing it!” Well, there’s only one way to find out! Let us know what you think of Nick’s handiwork:
Hi there,
I had some fun over the past few days re-scaling my Woodlore Knife. The original maple had stained over the years, so I decided to have a change:
Nick's re-scaled WK1 Woodlore Knife

Now that you have finished the hard work of making all those knots, you are ready for the finishing and final constructing of your hammock. At this time you will probably be able to make a Sheet Bend knot blindfolded. I have several hammocks knotted using sisal rope, but sisal really is murder on your hands. In the past I have worked with sisal until my hands were sore and blistering. So it was about time to try to make a hammock of green paracord. This makes life more easier. There is always a great sense of relief when you finally finish the net of the hammock. A milestone so to speak.
Now, cut 20 pieces of rope of 220 centimetres; these ropes you will be doubled and will be attached to the ends of the mesh of your hammock, acting as guy wires. Use two double wires for the middle two guy wires. This is because most of the force will be put to those wires. Figure 8 shows the mesh you need to take to attach the wires to.
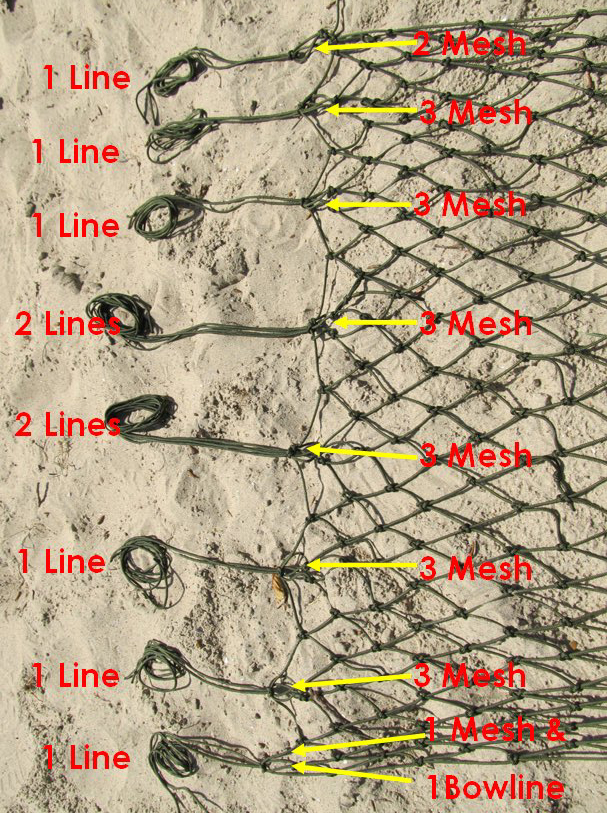
Figure 8 – Lines & Mesh


Woodlore Nordic Skiing Expedition
With the Woodlore Winter Expedition courses fast approaching in early 2012, we asked Woodlore Head of Operations Dan Hume to write us an article of his memories from the Woodlore Nordic Skiing course.
I have very fond memories of my time spent in Norway in February 2008. Perhaps it’s a course that almost lurks in the shadows and goes unnoticed but it really was so much more than I expected and truly was one of the best weeks I’ve spent outdoors.
Brian Desmond who led the course, is a very experienced person in his field and he introduced the group to the basics of skiing over several days, pushing some members of the group onto more difficult terrain when appropriate. We had time to practise our newly learned skills whilst being amongst breathtaking scenery.

Following the recent release of Woodlore’s new course dates for 2012, places on the one-day Walk in the Woods with Ray Mears sold out very quickly! Since then we have had many requests for more dates, as so many people had missed out. Therefore, due to popular demand for this fantastic day out with Ray, we are very pleased to announce two additional dates for this course to take place in May 2012 – Book your place here
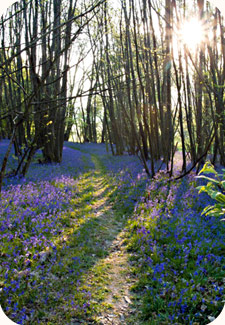
Walk in the Woods with Ray Mears course
This course would make a perfect Christmas present for any Ray Mears fan.
We anticipate these courses to sell out quickly, so please book soon to avoid disappointment.

If you’ve missed any episodes of the new series of Wild Britian with Ray Mears, you can now catch up online with the ITV Player – just click on the image below:


The following post was kindly provided by Woodlore customer Craig Turner:
Dear Ray Mears and Woodlore team,
First and foremost I would like to thank you for the enlightment over the years on the many people, places and the knowledge that you hold. Alongside forgotten pioneering explorers, you have also brought wonderful craftsman to the forefront of my attention. Thank you.
The raw materials

Make a small Bowline Knot in the first piece of rope and put the loop around the nail in cross B. Zigzag the rope loosely around the nails of the first and second row. When you reach the last nail in the first row, put the rope around the last nail in the third row and turn to the last nail of the second row to make your first knot (see Figure 3A & 3B).

Figure 3A - The Start

Figure 3B - The First Knot


